Why learn how to crochet with no pattern?
Many people find crocheting with patterns to be extremely limiting. I am not one of those. I thrive on sheet music in my classical musician life, and pattern-following in my crafting life.
However, there comes a time where it is useful to have techniques handy in order to “whip something up” when there is no physical, time, or mental capacity to find, print, match materials, and then create what someone else has carefully designed.
I have multiple young children and, without fail, every year when snow hits there are too few hats in the house. I have to grab the coziest yarn in my stash and make a hat in an hour so they can all play outside for however long the snow lasts where we are in the Appalachian Highlands. I have learned from a lot of trial and error what can work, and what certainly doesn’t.
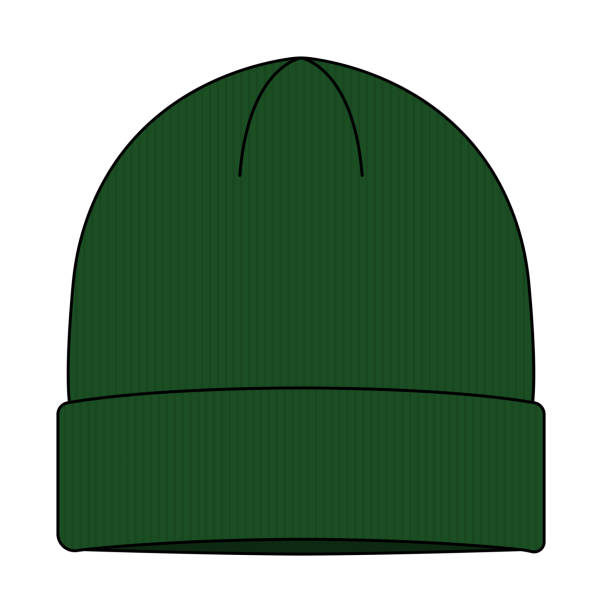
This is not intended to be a guide in designing, just a technique guide for free-hand impromptu hat crocheting. It will produce a basic hat, not the embossed or lacy wonders you see on Ravelry, but a plain jane hat. This is also a full lesson, so there will be suggestions and tips within the descriptions.
- Techniques needed and description
- For No-Pattern Hat making, you need to know 2 techniques. 1) Increasing, 2) working in the round.
- It is up to you whether you slip stitch join and chain 1 to start the next round, or work in a continuous round (as long as you have a stitch marker to track during your increase rows).
- For our purposes it is helpful to know the anatomy of a hat: crown, body, brim *we are talking about beanie style hat FYI, not trying to make any crocheted fedoras around here.* Brims for the no-pattern hats are optional, but if the body turns out a little too big, can be helpful to tighten the fit so as not to slide off the head. If the hat is for you or someone in your immediate household, the brim can be added later as needed.
- Yarn choice: I suggest a worsted or bulky weight yarn if it is a project that is intended to be done quickly, although the techniques apply for smaller weight yarns as we will go by measurement.
- Stitch Choice: If simplicity is what we are after, choose one of the classics (click here for list of the 5 basic crochet stitches). You may also use a repetitive stitch pattern, but that may be more complicated as the increases may change the effect of the desired pattern.
Formula
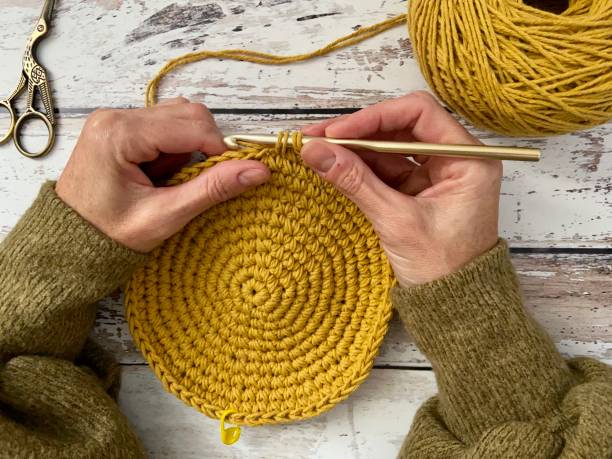
- Crown: This is the part at the top of the hat that is most practical for a crocheter to begin. Start the hat with crochet circle increase technique (click here for the lesson in increasing for a circle, we do not have space in this post). You will end up with a flat circle, for some- mostly flat, but that will round out as you proceed into the body of the hat. Below is a table for the general measurements for how big you need to make the crown. Measure from one side to the other (diameter) not around (circumference).
| Child (not babies) | Teen | Adult Small | Adult Large |
| 6.5 inches | 7 inches | 7.5 inches | 8 inches |
It is good to know the general size you are going for, however I usually end up eyeballing it as I do not carry a measuring tape. If you know the length of your hand, you can use that for comparison. It is much more difficult to lose a hand than a measuring tape when on a road trip.
The reason the crown may seem small is because as you move into the body, the rows continue to curve outward before flattening to the main body.
A more inflexible yarn, such as bamboo, cotton, or other plant fibers may not curve as easily and could actually end up going straight down from the crown. Be aware of that if you choose one of the plant and cellulose fibers to work with.
- Body: Stop increases. Work one stitch in each stitch around until you reach the desired length. This is most easily done in a continuous round.
- Rule of thumb: the length should be 1 inch longer than the crown is wide- eg: Adult small has a crown of 7.5 inches, so the length should be at least 8.5 inches.
- You may wish to abstain from a brim, and in that case lengthen the body by 1-3 more inches depending on the recipient.
- Brim: The most popular choice is a ribbed brim, for which you turn the hat sideways, chain the desired length of brim (2-4 inches is a typical brim length), single crochet in the back loops of each stitch, slip stitching to the coordinating stitch and next stitch of the circumference of the hat before working back down the brim ribbing.
- You may also continue in the round from the body and fold the excess up into a brim. This method is most helpful when creating for children. Head sizes change dramatically per year and this could make the hat able to be worn for multiple years, or by multiple children in the same day.
If you have made it to the end of the lesson, congratulations and I hope you feel equipped to whip up a hat next time there is an opportunity!
Please feel free to send me any questions or comments as you would if we were in the room together. The email is on the About page, but Dogwood Mountain Arts is also on Instagram and Pinterest. Come follow DMA on those platforms so that we can interact and connect!

Leave a comment